Table of Contents
Users of Post Timelines have the option to change and customize the colors of their timeline posts.
Post Timelines has two different types of posts:
- Default Posts – These are the default posts that are already available in Post Timelines
- Custom Posts – These are the posts that users have created themselves
The colors for these two types of posts can be changed using different methods. Let’s go over both of them.
Changing the Color of a Default Post #
To change the color of a default post, please follow the below steps:
- Log into your WordPress dashboard
- Go to the Post Timelines plugin and select the “All Timeline Post” tab
- On the next page, click on “Edit” for the default post you want to change the color of

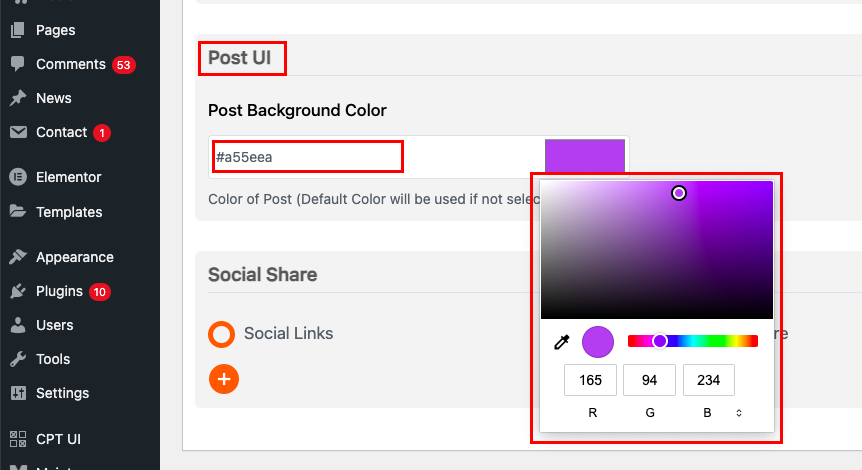
- On the “Edit Timeline Post”, scroll down to the “Post UI” section and change the post background color by entering a color code or using the color changing menu.

- Click on “Update” when you are done

Changing the Colors of a Custom Post #
To change the colors of a custom post you will need to follow the below distinct steps:
- Log into your WordPress dashboard
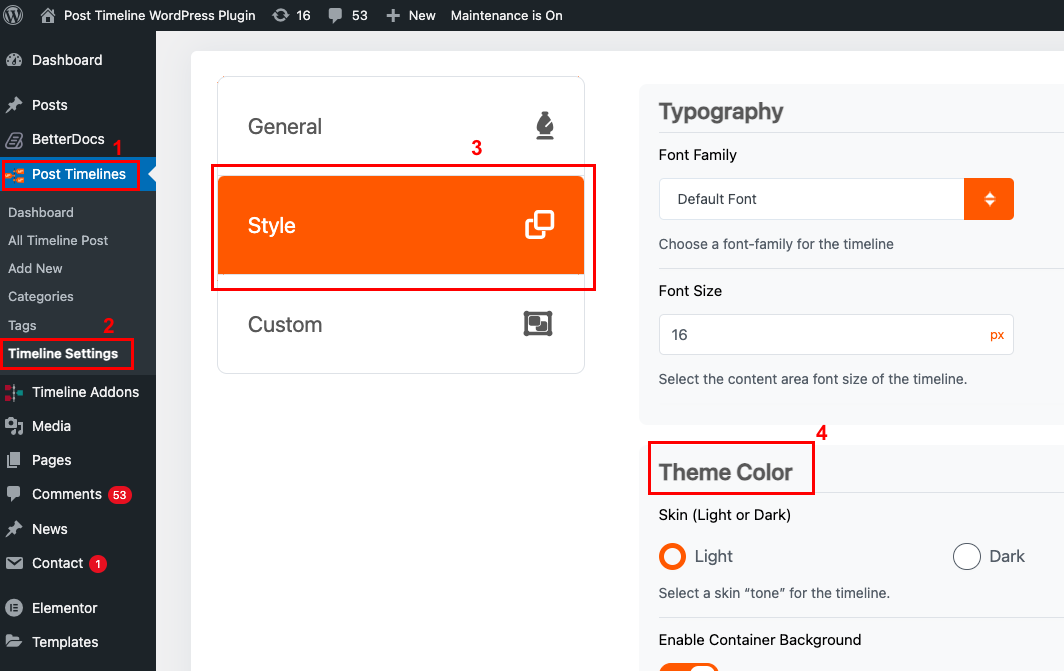
- Go to the Post Timelines plugin and select the “Timeline Settings” tab
- On the next page, click on the “Style” tab and then scroll down to the “Theme Color” section

- You can change the color of your custom post by adjusting the color code in the “Container background”, “Default Post Background”, “Line Color” and “Navigation Color” fields
- The colors can be changed by either entering a color code or by using the color-changing menu

- Click on “Save Settings” when you are done